The Bread Monk
  • Home
  • My Bread Blog
  • Breadhead Videos
  • Recipes
  • Fr. Dom's Books
  • Events/Programs
  • Shortcut Stollen
  • New Page

Baking Mix Recipes

5/4/2020

1 Comment

 
With Breadheads and newbie bakers alike finding it hard to locate yeast during the quarantine, I thought I would offer instruction on how to create a "no yeast" multigrain baking mix which can be used for quick breads like muffins, biscuits, waffles and the like. Here is the short video I made with instructions. The recipe follows.
Multigrain Baking Mix and how to use it
 
If you already use baking mixes, you might be surprised to see that this version requires refrigeration, but you might be equally surprised to discover that the package on the commercial versions also recommends that you refrigerate their product after opening. But most baking mixes use shortening and have a number of preservatives and therefore are more “shelf-stable” as they say in the food biz. My version has no preservatives and uses butter (far fewer trans fats), which with the addition of whole grains makes it a healthier alternative. (If you’re going low-fat, use only one stick of butter.) You can use it one-to-one in any recipe that calls for baking mix.
   
Multigrain Baking Mix
Ingredients:
3 cups all-purpose flour
1½ cups whole wheat flour
¾ cup quick cooking oatmeal
½ cup yellow cornmeal
¼ cup milled flaxseed
2 tablespoons baking powder
1 tablespoon salt
1 cup (2 sticks) cold unsalted butter, cut into slices
 
Place dry ingredients into food processor and process until thoroughly mixed. Add butter and pulse until well blended. Store in an airtight container in the refrigerator up to 6 weeks (depending upon how fresh your butter is). If you use salted butter, reduce the salt in the recipe by ½ teaspoon.
Picture
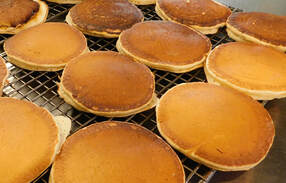
 Pancakes
2 cups baking mix
1 cup milk
2 eggs
N.B.: This is the classic recipe, but I think these are better with 1¼ cup of milk and only one egg.  I can't imagine you need anything more than the ingredients!


Picture
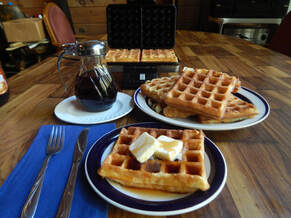
Waffles
2 cups baking mix
1 1/3 cups milk
2 eggs
Separate the eggs, then beat the milk and yolks Add milk mixture to baking mix and stir until just combined. Whisk egg whites until stiff peaks appear and fold gently into batter.  Use in waffle iron according to manufacturer's instructions.
NOTE:
​If you like a waffle with a crisp exterior, leave the waffle iron closed until the steaming stops.
Picture
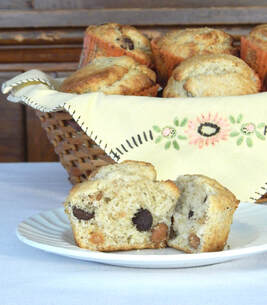
(OK, the picture here isn't blueberry muffins--those are chocolate and butterscotch chips---but you get the idea!)
Blueberry Muffins

2 cups baking mix
1⁄3 cup sugar
2⁄3 cup milk
2 tablespoons vegetable oil
1 egg
3⁄4 cup frozen blueberries
 
Heat oven to 400 degrees and coat muffin pan with cooking spray. Combine sugar, milk, oil and egg in a small bowl and beat well. Place baking mix in a medium bowl and add liquid, stir until just moistened. Gently fold in the blueberries. Divide batter evenly in 9 muffin cups.
Bake 13 to 18 minutes or until golden brown.
Picture
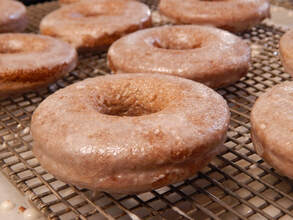
Baked Cinnamon Donuts with Chai Glaze
Donuts
1¾ cup of baking mix
1/3 cup granulated sugar
½ tsp. ground cinnamon
¾ cup 2% milk
1 egg
¼ cup vegetable oil
 
Preheat oven to 375° F. and lightly grease a donut pan. In a medium-size bowl, combine flour, sugar, salt, and cinnamon and whisk thoroughly to combine. In a separate bowl, whisk together milk, egg and oil. Pour milk mixture into dry ingredients and stir until smooth. Divide batter into pan. Bake in preheated oven for 15 to 20 minutes or until slightly firm to the touch and an inserted toothpick comes out clean. Cool in pans for five minutes before removing from pan to a wire rack; frost while warm.
 
Chai Frosting
Make one cup of sweetened chai tea. In a small sauce pan, bring to a boil, then reduce heat to a low simmer. Reduce to about ¼ cup of thick syrup. Immediately add 1 cup of powder sugar and a pinch of salt, and whisk until smooth. While mixture is still warm, use to lightly glaze donuts.



Picture
Pumpkin Spice Donuts
2 cups baking mix
2 teaspoons pumpkin pie spice
1 cup pumpkin puree (not pie filling)
2 eggs
3/4 cup liquid pumpkin spice creamer (or 1/2 cup milk)
¾ cup packed brown sugar
¼ cup canola oil


Preheat oven to 350 degrees F. Prepare two donut pans (12 donuts total, or 24 mini donuts) with cooking spray and set aside. In a medium size bowl, whisk together baking mix and pumpkin pie spice. In a separate bowl, combine pumpkin, eggs, creamer/milk, sugar and oil. Add the flour mixture to pumpkin mixture and stir until nearly smooth—do not overbeat. Allow to sit for 5 or ten minutes while the whole grains absorb the liquid, which takes longer than with all-purpose flour.
 
Transfer the batter to a large ziploc bag and expel excess air before sealing. Snip one corner of the bag and pipe batter into donut pans---each section will be slightly more than half full. Bake for 12-15 minutes or until donuts are lightly browned and spring back when touched. Allow donuts to rest about five minutes in pan before removing to cool on a wire rack.

Glaze or frost as desired, or toss in cinnamon sugar. 

Picture
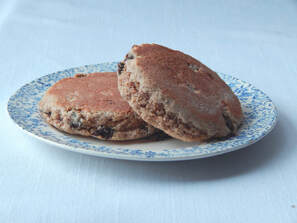
Welsh Cakes
2 cups baking mix
1/3 cup granulated sugar
½ teaspoon cinnamon
¼ teaspoon freshly-ground nutmeg
½ cup currants or raisins
1 large egg
1/4 cup cold milk
Butter for the pan

Combine baking mix, sugar and spices in a medium-size bowl and whisk to blend.  Stir in the currants. In a separate small bowl, beat the egg with the milk; stir into mixture to make a soft dough. Turn the dough out onto a lightly floured board and knead briefly, 8 to 10 strokes. Lightly flour the board, then roll the dough to a 1/4-inch thickness. Cut into rounds with a fluted cookie cutter (2½” or 3”size).  Heat a cast iron skillet over medium-low heat (or use an electric skillet set to 350° F).  Brush the surface of the pan lightly with butter and cook the cakes for about 3 minutes per side, or until they are golden brown. (I usually test one first to make sure I have the temperature correct--they should come out soft in the middle but not at all doughy).  Remove to a wire rack and sprinkle with granulated sugar.  Serve warm.


Picture
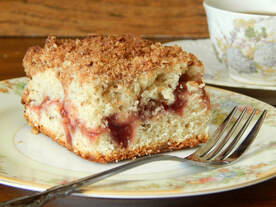
The photo shows the version with a strawberry cake filling, but any way you make this coffeecake it's delish!
Quick Cinnamon Coffee Cake
Streusel
2/3 cup baking mix
2/3 cup packed brown sugar
1 teaspoon ground cinnamon
3 tablespoons cold butter
 
Coffee Cake
2 cups baking mix
1/8 teaspoon baking soda
2 tablespoons granulated sugar
¾ cup sour cream
1 ½ teaspoons vanilla
1 egg
 
Heat oven to 375°F. Spray bottom and sides of 9-inch round cake pan with cooking spray and dust with flour. Combine 2/3 cup baking mix, brown sugar and cinnamon in a small bowl. Cut in butter using pastry blender, until the mixture resembles coarse crumbs; set aside.
 
In medium bowl, combined  baking mix, baking soda, and sugar and whisk until blended. In a separate bowl, beat sour cream, vanilla and egg until smooth. Stir into dry ingredients until combined. Spread about 1 cup of the batter in pan. Sprinkle with about 3/4 cup of the streusel. Drop remaining batter evenly over top of streusel and sprinkle remaining streusel over top.
 
Bake 20 to 24 minutes or until golden brown. Let stand 10 minutes before removing from pan and allow to cool slightly before serving.
 
Variations
Add another tablespoon of butter to the streusel. Peel and core two medium baking apples and slice them thinly. After you put half of the batter in the pan, arrange apple slices on top and sprinkle with half the streusel. Add the second layer of batter and the remaining streusel. Bake as directed—may need up to 25 minutes in the oven. You can do the same with fresh or even canned peaches, but cut them into small pieces.
 
Make only half of the streusel. After you put half the batter in the pan, add a layer of cake and pastry filling or pie filling. If you use cherry filling, use almond extract instead of vanilla, and add some slivered almonds to the top streusel.
 
Omit the cinnamon from the streusel recipe, and use 1½ to 2 cups of fresh strawberries as the filling. You can use half brown and half white sugar for the streusel.
Picture
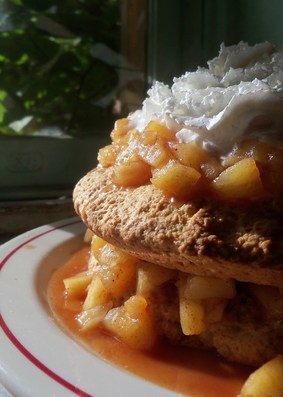
Whole Grain Nutty Shortcake with Tart Apple Topping
3 cups of multigrain baking mix
½ cup light brown sugar, firmly packed
¼ teaspoon ground nutmeg
½ cup coarsely chopped pecans
1 egg
¾ cup of milk
 
 APPLE TOPPING
½ cup brown sugar
2 tablespoons cornstarch
1 tsp. ground cinnamon
¼ tsp. salt
1 ½  cups apple cider or apple juice
5 cups tart apple pieces (peeled, cored, quartered and sliced)


Heat the oven to 425 degrees F. Combine baking mix, brown sugar, nutmeg and nuts in a medium size bowl. In a separate bowl, whisk together egg and milk. Add milk mixture to flour mixture and stir until blended; beat for one minute. Divide dough in half and into two greased 9-inch pie pans.  Bake in the preheated oven for 15 to 20 minutes, or until lightly browned and slightly firm to the touch.

While the shortcake is baking, make the topping.  Combine the brown sugar, cornstarch, cinnamon and salt in a large saucepan. Stir in the cider and cook over medium high heat until the sauce is clear and thickened. Turn the heat down to medium, then add the apples.  Cover and let simmer until the apples are tender. Spoon half of the apple mixture over each shortcake layer (you may serve them individually or stacked.)  Serve warm with whipped cream and toasted pecans for a garnish.
1 Comment

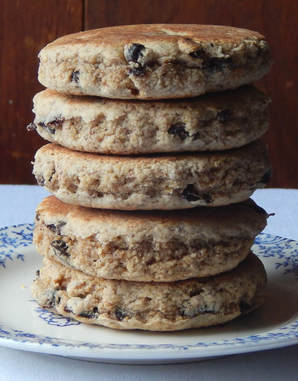
Welsh Cakes

6/11/2019

1 Comment

 
Please forgive my long hiatus from the Bread blog! I can honestly say I have no idea how or why I got so neglectful, but I'm resolved to make it up to my loyal Breadheads.

One of my most popular bread demos in recent years has been one using a multigrain baking mix I developed. It's used in the same way as
BisquickTM but has more whole grains and fiber, plus it uses unsalted butter instead of shortening. My first blog about it is HERE along with the recipe. It will also be featured in an upcoming book, along with several quick and tasty recipes. I use it most often for waffles, but I also keep it on hand for pancakes, muffins, biscuits and more unconventional recipes, like Welsh Cakes. 
Picture
Welsh Cakes are like a cross between pancakes and English muffins, all of these being small breads cooked in a skillet. Welsh cakes are thicker and heartier than pancakes, but not as dense and chewy as English muffins. With a baking mix, they take little time to prepare, and with the addition of spices and dried fruit of various kinds, you can produce a variety of flavor profiles, one of which is sure to become a favorite. Traditionally one uses cinnamon and nutmeg along with raisins or currants, but I like using Chinese five spice for the light licorice flavor of the anise and the light kick from the pepper in the blend. This spice blend is now available in most grocery stores, usually in the baking aisle, but sometimes with the Asian foods. In case you don't have it in your area, you can find a recipe for it HERE

​Welsh Cakes

2 cups baking mix
1/3 cup granulated sugar
½ teaspoon cinnamon
¼ teaspoon ground nutmeg
½ cup currants or raisins
1 large egg
1/4 cup cold milk
Butter for the pan

Combine baking mix, sugar and spices in a medium-size bowl and whisk to blend.  Stir in the currants. In a separate small bowl, beat the egg with the milk; stir into mixture to make a soft dough. Turn the dough out onto a lightly floured board and knead briefly, 8 to 10 strokes. Lightly flour the board, then roll the dough to a 1/4-inch thickness. Cut into rounds with a fluted cookie cutter (2½” or 3”size). If you don't have a fluted cutter, use an ordinary biscuit cutter, but one that has sharp enough edges to cut through the raisins/currents. 

Heat a cast iron skillet over medium-low heat (or use an electric skillet set to 350° F).  Brush the surface of the pan lightly with butter and cook the cakes for about 3 minutes per side, or until they are golden brown. (I usually test one first to make sure I have the temperature correct--they should come out soft in the middle but not at all doughy).  Remove to a wire rack and sprinkle with granulated sugar.  Serve warm. 
1 Comment

Lake Thunderbird 2018 Day #2

7/3/2018

0 Comments

 
Picture
After I said morning prayer and cleaned up after my sourdough pancake breakfast, I made a batch of multigrain dough. I can’t give you the exact recipe, but it had white bread flour, a multigrain mix I brought (whole wheat, cornmeal and oatmeal), the leftover sourdough pancake batter, a cup of warm milk and a cup of cold coffee, along with yeast, a little sugar, salt, two eggs, and vegetable oil. I kneaded it a solid 15 minutes to make sure I developed the gluten matrix, which takes more time in a multigrain dough. After it proofed for just over an hour, I shaped six hamburger buns, four hot dog buns, and a sandwich loaf. Before long the cabin smelled glorious, and there was a week’s worth of bread cooling on the counter.

Picture
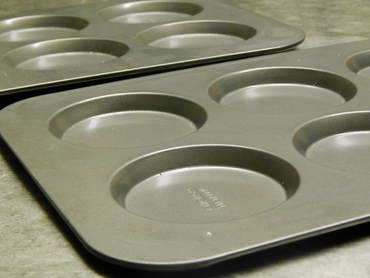
Although it’s not absolutely necessary to have them, I used special pans for the hamburger buns. I’m not sure if they are for buns or for muffin tops (I’ve seen them labeled both ways) but they make for a nice uniform shape. A hamburger bun requires about 2 ounces of dough, perhaps more if you’re serving a half pound burger. My burger for supper was more modest and the bun was a perfect size. The burger itself did not remain on the plate long enough to get a picture, but as you can see above, at least I managed to get a shot of the buns cooling on the picnic table on the front patio!

Now that I have the grill up and running, I’ll have to start experimenting with pizza. I’ve heard a lot of people swear by pizza cooked directly on the grate, but that doesn’t appeal to me as much as heating a pizza stone in a closed grill, which seems to me to imitate an authentic pizza oven more closely. They even make inserts for kettle grills that transform them into pizza ovens—I may have to make an investment in one before long. My long term goal is a wood-fired pizza oven for the west patio of the monastery---but more on that another day.
0 Comments

"Creamed Corn" Cornbread

7/17/2017

0 Comments

 
Picture
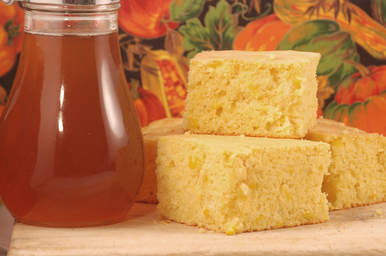
Yesterday (July 16) was National Corn Fritter Day, and I posted a link on Facebook to a previous post on The Cornbread Book by Jeremy Jackson. I didn't make corn fritters yesterday, mainly because my blood sugar was trending a bit high. But we had corn (off the cob, frozen) for supper last night, and I thought someone out to do something about the leftovers, so I decided to make cornbread, adapting a recipe in the aforementioned book (which you really should buy---it's a gem!) His original recipe uses creamed corn, something we rarely serve here at the abbey, so I adapted it by simply sending the whole kernels through the food processor and then adding them to the liquids. The resulting bread has a more intense corn flavor and doesn't suffer from the "Dry Crumblies" as some cornbread does. Here's my version:

1 cup all-purpose flour
1 cup stone-ground cornmeal
2 teaspoons baking powder
1 teaspoon salt
1 cup whole corn kernels, finely chopped in food processor
1 large egg, lightly beaten
1 cup milk
1/4 cup granulated sugar
2 tablespoons of vegetable oil

Preheat the oven to 425 degrees F., and grease an 8" x 8" baking pan with cooking spray. Sift the flour, cornmeal, baking powder, sugar and salt into a large bowl and stir until well-combined. In a separate bowl, whisk together corn, milk, egg, and oil.

Add the wet ingredients to the dry and stir until just combined. Don't overbeat, but be sure to use a rubber spatula to make sure there are no pockets of dry ingredients along the sides or bottom of the bowl. Pour batter into pan and spread it evenly. Bake for 20 to 25 minutes, until the top begins turn golden brown and the bread pulls away from the sides of the pan slightly. The top of the loaf should spring back when pressed with a fingertip.

0 Comments

Breadhead Breakfast Countdown 41/120

8/7/2015

0 Comments

 
Picture


Day #41


Overnight Multi-grain Waffles


Haven't been doing much with the new cookbook lately, and for a few hours yesterday I thought it would be necessary to cancel or at least postpone the project. I had been told that I was going to be teaching an additional class at the Academy first semester, one with a new book in a subject I hadn't taught before. Anyone with experience teaching a new class knows that it means a daily extra hour or two of work writing lesson plans, finding resources, creating and grading assignments. So I figured that meant the book project would have to be put on hold. But my informant was, it turns out, misinformed. I decided to celebrate my narrow escape by making multigrain waffles. 
Picture
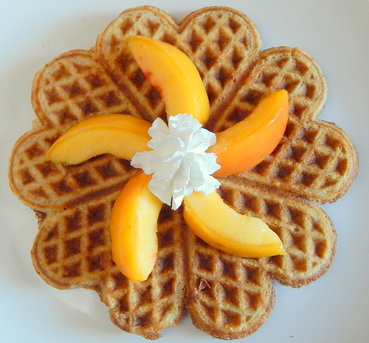
I like just about any breakfast recipe you can start the night before, and these flavorful waffles are among my favorites. Although the recipe I'm sharing uses fast-rising yeast, I usually make these heart-healthy treats with sourdough starter, but that’s a recipe for another cookbook! The brethren gobble them up, especially our Br. Luke, who recommends that you pair them with fresh fruit instead of syrup.  If you can’t bear to wait until the next day to enjoy them, let the batter rise for at least one hour, then proceed as directed.

Picture
---Don’t feel restricted to the flours named in the recipe.  You could replace the rye with amaranth flour (a high protein grain first grown by the Aztecs) or the whole wheat with spelt or kamut (similar tasting ancient grains with less gluten).  Try miller’s bran or rolled oats instead of wheat germ, or crush some granola for a unique crunch.  Whenever using flours other than all-purpose white, you may find you need to add a little more milk to make the batter pourable, since some grains absorb liquid faster than others. You can even make these waffles gluten-free with a GF baking mix (Hodgson Mill makes a good one) or any all-purpose GF flour, but don’t use malt syrup. 

Here's the recipe I used, originally published in More Breaking Bread with Father Dominic:

Overnight Multi-grain Waffles 
1 pkg. fast rising yeast
1½ cups all purpose flour
¼ cup whole wheat flour
¼ cup rye flour
2 Tbs. wheat germ
1 tsp. salt
1½ cups milk
1 Tbs. malt syrup, dark corn syrup, or molasses
1 Tbs. vegetable oil
2 eggs
2 tsp. vanilla extract

Combine yeast, flours, wheat germ, and salt in a medium size bowl and stir until thoroughly blended. In a separate container, combine milk, syrup and oil and heat to 120 degrees F. Pour into dry ingredients and stir until batter is smooth. Cover the bowl with plastic and place in a cool place overnight (it could be the refrigerator, but a counter in an air-conditioned room will do). In the morning, stir batter down. Add eggs and vanilla and beat until thoroughly incorporated. If the batter seems a bit stiff, stir in a couple of tablespoons of milk at a time until it flows freely. Preheat waffle iron and use batter according to manufacturer’s instructions.

National Waffle Day is August 24, the anniversary of the patenting of the first U.S. waffle iron invented by Cornelius Swarthout of Troy, New York. Get yours out fire it up for some multi-grain goodness.

God bless and happy baking!

0 Comments

Holy Thursday: Whole wheat rounds

4/17/2014

1 Comment

 
Picture
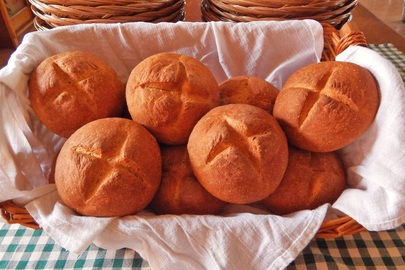
Every year for supper on Holy Thursday I like to serve whole wheat bread, usually medium size loaves with a cross cut in them, one loaf for every set of four monks.  This year they turned out unusually pretty, or at least the photo did, so I thought I'd share it. As I often do, I added some potato to the mix for a tender crumb and used honey as the sweetener.  We have plenty of honey (although we lost more than half our hives over the long, hard winter) but my friend Dan gave me some of his that had sugared up pretty heavily.  You can easily restore crystallized honey by warming the jar in a saucepan of water over low heat, but in this case just pulled out a few tablespoons and added it to the liquids.  Honey makes for a beautifully browned crust, but it can also cause the crust to get too dark.  Many bakers recommend turning the oven temp down by 25 degrees, or covering the loaves lightly with foil for the last half of the baking time.  I did neither, but I like the results I got.  Hope the brethren will, too.

1 Comment

A plea for help

11/6/2012

0 Comments

 
 I received this request from a dedicated Breadhead named Tom:

oh please help. I had a printout of your multi-grain bread all folded
nicely in my cookbook and it was wonderfully worn thin and scribbled on
(add some of this seed, not that seed, notes that such and such family
member was allergic to flax, etc etc.

My brother doesn't know where it went and now, I can't even remember the
original recipe. google has been fruitless...well, breadless at best.

It really is, by far, the best recipe I ever had. (I scanned the printout
and sent it to my daughter (the flaxless one) and she knows she has it on
an old external hard drive and alas, all of her drives became waterlogged
over the last week in Brooklyn (otherwise, she has her humor and "the
important stuff")

except the recipe...

please oh please....

I had not thought about it, but I'll bet a lot of favorite recipes and treasured cookbooks are victims of Storm Sandy (please remember the human victims in your prayers, and donate to the Red Cross for relief).  In this case I was able to send him what he was searching for without difficulty.  The recipe is now posted here.
0 Comments

    Author

    Fr. Dominic Garramone AKA 
    the Bread Monk

    Categories

    All
    Breadhead Bookshelf
    Breakfast Breads
    Buns Rolls And Biscuits
    Craftsy
    Donuts
    Equipment
    Ethnic Breads
    Events
    Gluten Free
    Herbal Breads
    Holidays
    Lake Thunderbird
    Memories Of Mama
    Multigrain Breads
    Pastries
    Pizza
    Places To Visit
    Quick Breads
    Reflections While The Bread Is Rising
    Savory Breads
    Sourdough
    Spirituality
    Stuff Besides Bread
    Sweet Breads
    The Classics
    Tools Of The Trade

    RSS Feed

    Archives

    June 2024
    December 2023
    September 2022
    April 2022
    March 2022
    February 2022
    January 2022
    October 2021
    May 2021
    April 2021
    March 2021
    February 2021
    August 2020
    July 2020
    May 2020
    February 2020
    October 2019
    June 2019
    September 2018
    July 2018
    May 2018
    April 2018
    March 2018
    February 2018
    January 2018
    December 2017
    November 2017
    August 2017
    July 2017
    June 2017
    May 2017
    April 2017
    March 2017
    February 2017
    January 2017
    December 2016
    November 2016
    October 2016
    September 2016
    August 2016
    June 2016
    May 2016
    April 2016
    February 2016
    December 2015
    November 2015
    October 2015
    September 2015
    August 2015
    July 2015
    June 2015
    May 2015
    April 2015
    March 2015
    December 2014
    November 2014
    October 2014
    September 2014
    August 2014
    July 2014
    June 2014
    May 2014
    April 2014
    March 2014
    February 2014
    January 2014
    December 2013
    November 2013
    October 2013
    September 2013
    August 2013
    July 2013
    June 2013
    May 2013
    April 2013
    February 2013
    January 2013
    December 2012
    November 2012
    October 2012
    September 2012
    August 2012
    July 2012
    June 2012
    May 2012
    April 2012
    March 2012
    February 2012
    January 2012
    December 2011
    November 2011
    October 2011
    September 2011

Web Hosting by FatCow